
My first disastrous sheet-pan weeknight taught me everything about how to bake boneless chicken thighs without drying them out. I tried pounding, dunking, and an Instagram hack that left the meat gummy.
What worked was simple: salt early, sear for color, finish gently in the oven, and rest. Read on and you will have flavors that feel like takeout, with a texture that stays moist every time.
This recipe sits between weeknight and small dinner party. Expect about 15 min active prep, 25 to 30 min cooking, beginner-friendly with one slightly technical move: hitting the pan hot enough to build color. Lately I see people dry-brining before searing more often, and it does help here.
1. The Pre-Sear Setup: Dry Brine and Temper
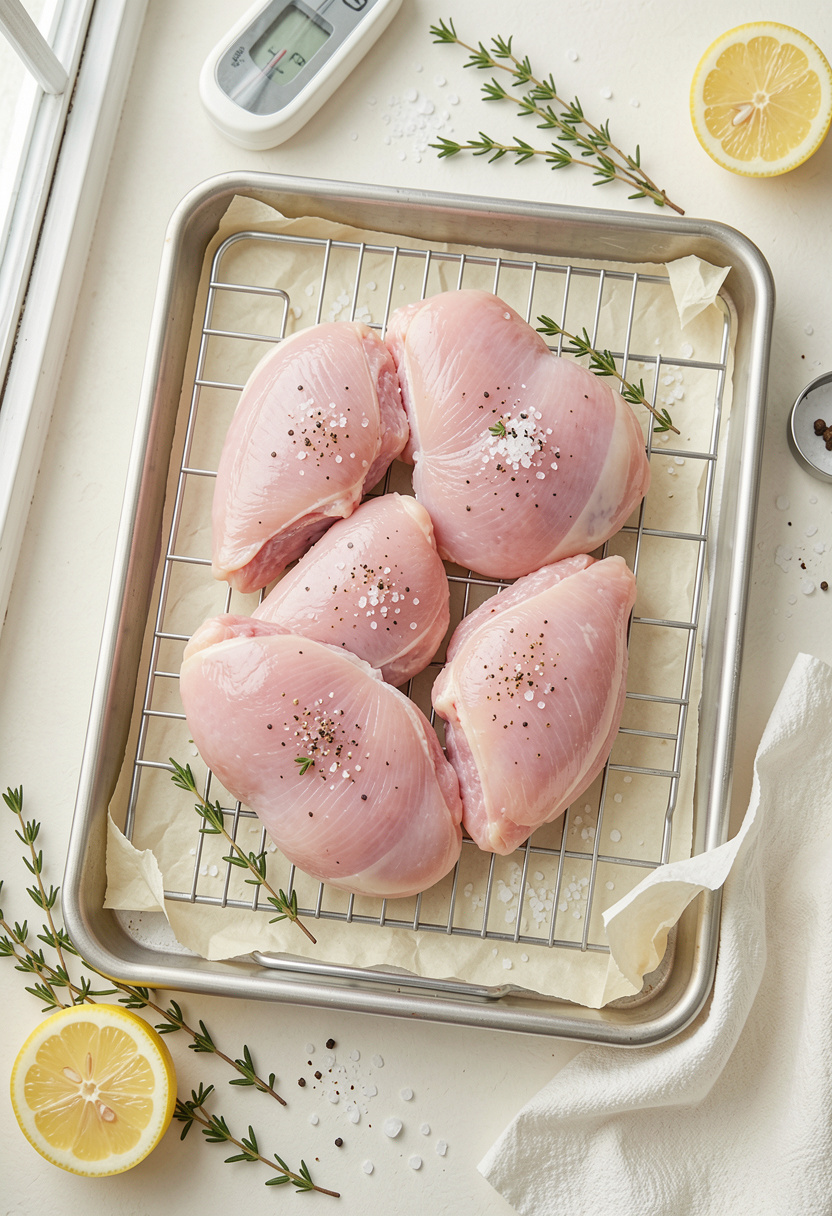
Salt is the single most powerful moisture-control move. I dry-brine thighs with Diamond Crystal kosher salt at least 30 min, ideally overnight. Salt restructures proteins so they hold juices during cooking.
Lay thighs on a wire rack over a rimmed pan. Sprinkle about 3/4 tsp kosher salt per pound and a little black pepper. Let sit 30 min to 12 hr refrigerated uncovered for skinless thighs to concentrate flavor.
Tools matter. A Diamond Crystal kosher salt 3 lb box makes salting easy and forgiving. Use an oven safe wire rack so air circulates. Common mistake: salting seconds before cooking. That gives surface salt but not moisture retention. Do the brine ahead and you will notice a cleaner chicken flavor and more even browning.
2. The Sear in Smoking-Hot Cast Iron
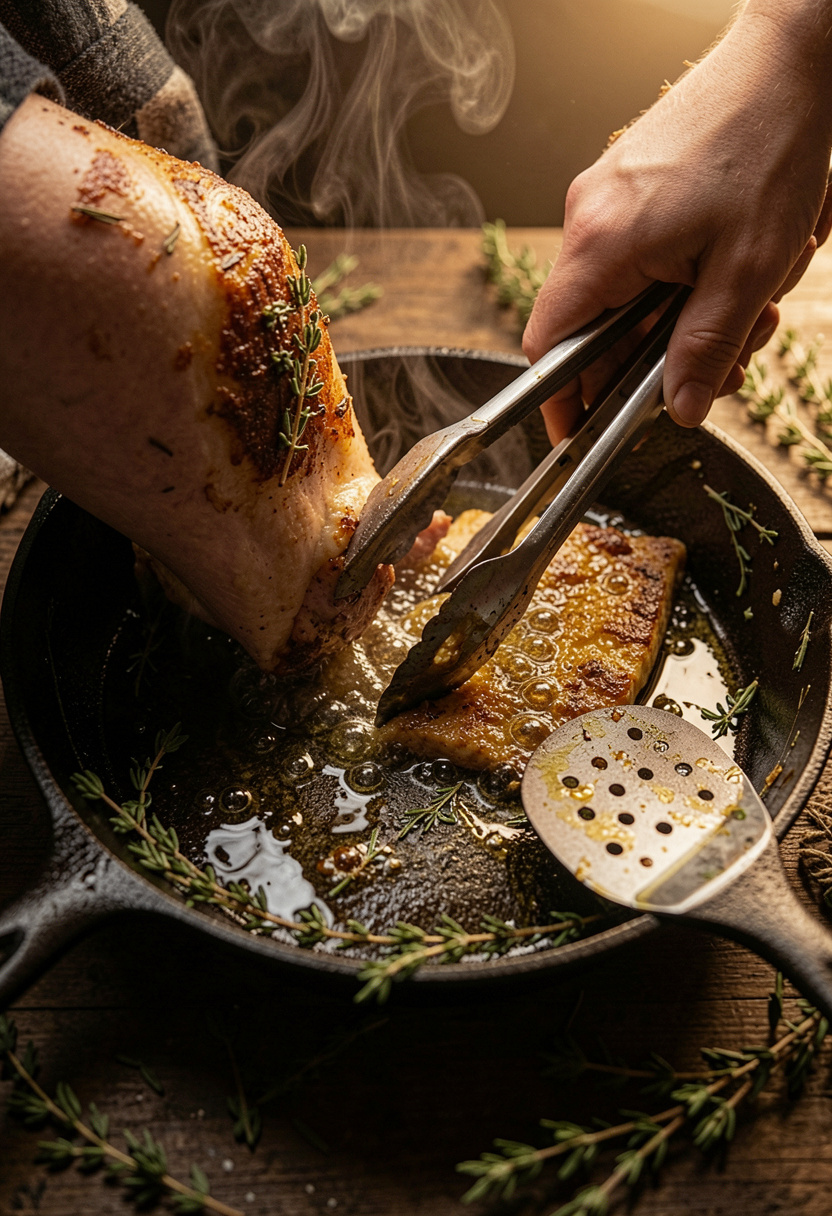
Color equals flavor. Get your pan ripping hot so the Maillard reaction kicks in. Preheat a Lodge cast iron skillet 12 inch over medium-high for 4 to 6 min until a drop of water skitters.
Pat thighs dry with paper towels, brush lightly with oil, and sear 2 to 3 min per side until a deep golden crust forms. I use an OXO stainless steel tongs 12 inch to flip and avoid piercing the meat. The fond left in the pan will be your flavor base.
Mistake: crowding the pan. When thighs touch you steam them. Cook in batches and keep finished pieces on a warm rack. Sear first, then the oven finishes the cook without drying.
3. The Butter Baste With Garlic and Thyme
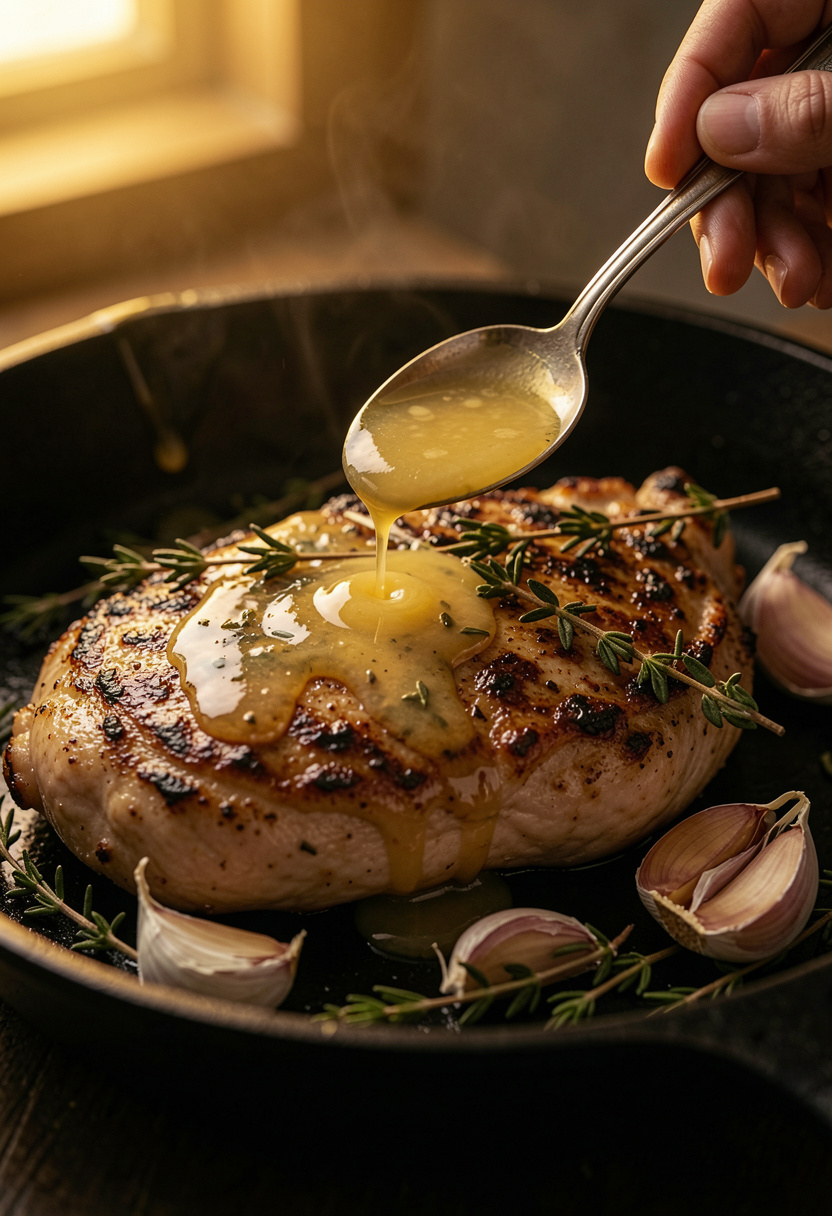
Basting builds gloss and layers of flavor. After searing, lower heat, add 2 tbsp butter and 2 smashed garlic cloves plus thyme. Tilt the pan and spoon butter over thighs for 45 to 60 sec.
I prefer Kerrygold butter 8 oz for its nutty note. Basting emulsifies fat with pan juices which keeps edges juicy and feeds the final sauce. The principle is simple: coating the surface slows evaporation and carries flavor in.
Mistake: adding cold butter straight from the fridge. Warm the pan first so butter browns quickly rather than cooling the skillet and stalling the sear. The result should be glossy thighs with a fragrant, toasty butter aroma.
4. The Gentle Oven Finish And The Rest That Saves It
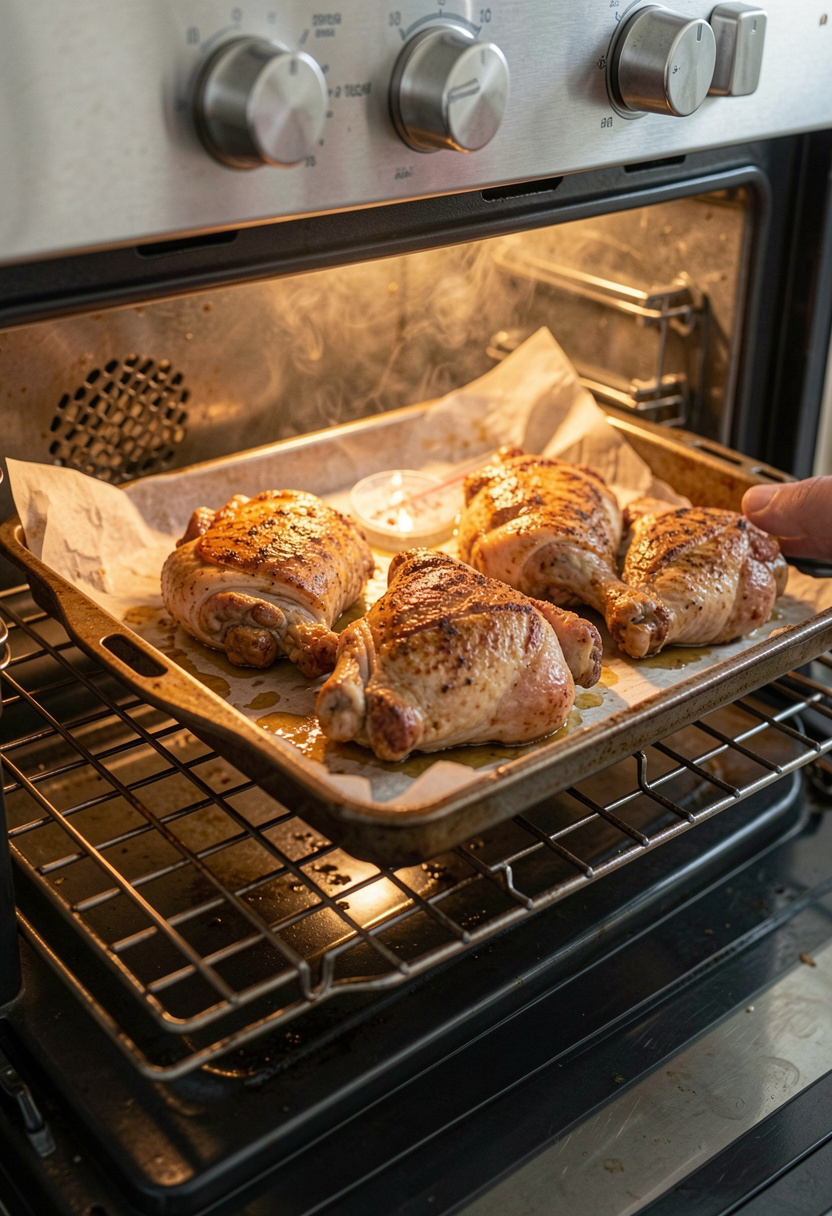
Finish in a 400°F oven for 8 to 12 min depending on thickness. Aim for an internal temp of 160°F and let carryover bring it to 165°F. USDA recommends 165°F for safety, so use an instant-read thermometer to be sure.
A ThermoPro instant read thermometer takes out guesswork. If you like a glaze, brush it on in the last 2 min under the broiler. Rest thighs 5 to 8 min tented loosely. Resting equalizes juices so each bite is moist.
Mistake: slicing too soon. Cutting right off the pan bleeds liquid onto the board. Rest, then slice. The result will be tender, glossy meat with a bright finishing hit from lemon or vinegar.
Common Cooking Mistakes to Avoid
Mistake: Crowding the pan while searing
Why it doesn't work: The pan temperature drops and you steam instead of browning.
Do this instead: Sear in batches with at least 1 inch between pieces using a Lodge cast iron skillet 12 inch.
Mistake: Salting right before you cook
Why it doesn't work: Salt needs time to redistribute for moisture retention.
Do this instead: Dry-brine for 30 min to overnight with Diamond Crystal kosher salt 3 lb box.
Mistake: Relying on color alone for doneness
Why it doesn't work: Color can mislead with dark marinades.
Do this instead: Check with an instant read thermometer and remove at 160°F to rest to 165°F.
What You'll Need to Make This
Pantry Staples
Diamond Crystal kosher salt 3 lb box around $5 to $8
Maldon sea salt flakes 4.4 oz around $6 to $12
Specialty Ingredients
Lao Gan Ma chili crisp 7.4 oz around $6 to $12
Kerrygold butter 8 oz around $3 to $5
Tools That Earn Their Counter Space
Lodge cast iron skillet 12 inch approx $25 to $40
ThermoPro instant read thermometer approx $15 to $30
Half sheet pan 18×13 inch around $12 to $25
Cookbooks Worth the Shelf
Salt Fat Acid Heat by Samin Nosrat (price range $18 to $28)
The Food Lab by J. Kenji López-Alt (price range $18 to $30)
Budget Swaps
Unbleached parchment paper 50 ft around $8 to $15 (Aldi has similar for less)
Shopping Guide for This Recipe
Seasoning Source: Buy Diamond Crystal kosher salt for predictable salting, about $5 to $8. Link
Substitution Hack: No cast iron Use a heavy stainless steel skillet and a half sheet pan 18×13 inch for finishing, approx $12 to $25.
Trend Tip 2025: Dry-brining and high-heat searing remain popular for juicy poultry; see modern test kitchens in cookbooks like The Food Lab.
Splurge vs Save: Splurge on a good thermometer like ThermoPro instant read thermometer approx $15 to $30; save on butter with store-brand clarified butter.
Conclusion
Start with the dry-brine. It is the highest-impact, lowest-effort move you can make for baking boneless chicken thighs.
Finish with the rest. Let carryover heat and a squeeze of lemon pull the flavors together. A good thermometer is your best shortcut.
Will you try the overnight dry-brine first or go straight to the sear-and-oven finish?