
My first cobbler flop was a soggy, syrupy puddle that tasted polite but sad. I wanted crisp edges and jammy apples, not pie filling in a bowl.
If you want to know how to make apple cobbler at home that has a golden, crispy edge and jammy pockets inside, this guide shows the exact moves. Expect about 20 min prep, 40 min bake, beginner-friendly with one small timing trick that makes all the difference.
Apples, sugar, butter, and heat. That is the flavor frame here, a classic American comfort dish with a late-fall vibe. Total hands-on time is short, and the technique is forgiving if you follow the browning and rest cues. Lately I see home bakers favoring pie spice blends and browned-butter toppings, which I lean into for deeper flavor.
1. Crisp Filling: Cook Apples Until They Glaze
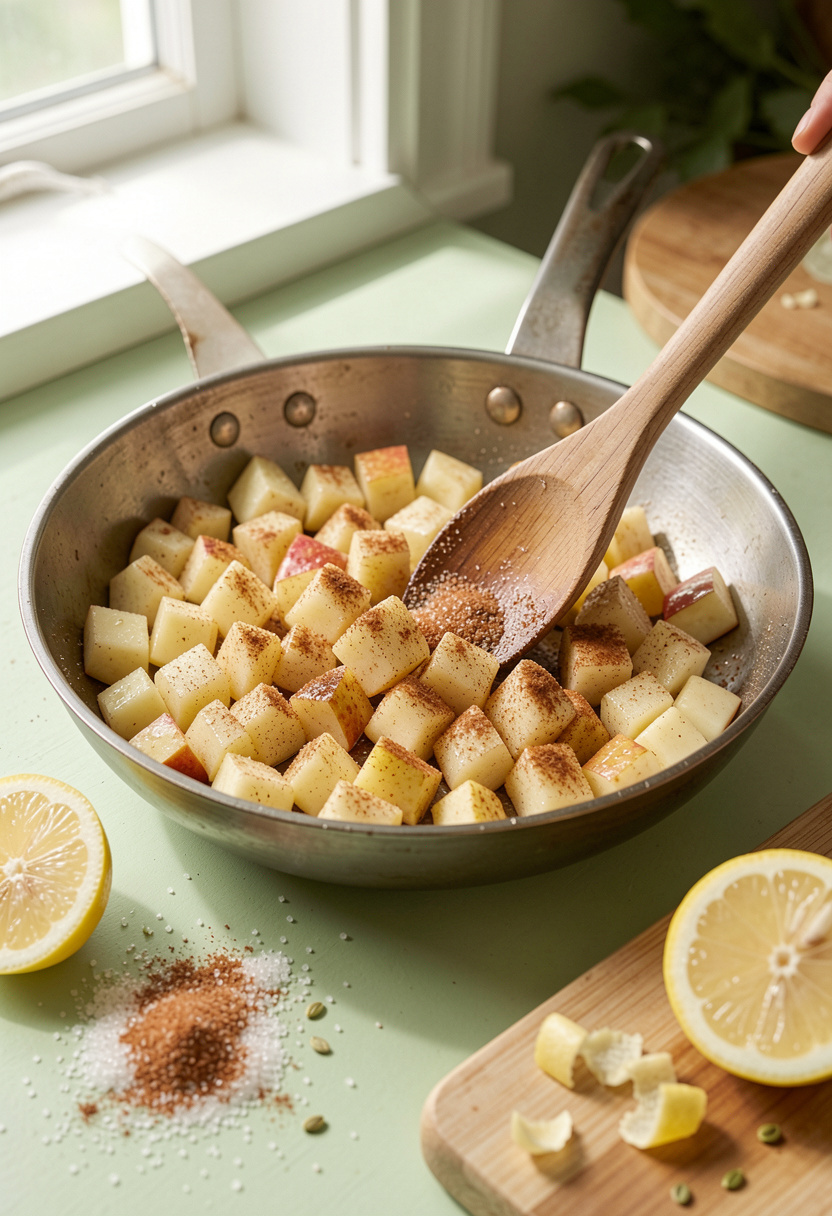
Start by cooking the apples briefly on the stove to concentrate flavor and evaporate excess juice. This order prevents a soggy top later.
Use a sturdy pan like a Lodge cast iron skillet 10 inch approx $20 to $35 and a microplane grater around $10 to $18 for fresh lemon zest. The heat releases sugars so the apples start to caramelize, a simple Maillard-adjacent reaction that builds depth.
Cook diced Granny Smith or Honeycrisp apples with 2 tbsp brown sugar and 1 tsp ground cinnamon over medium-high for 6 to 8 min, stirring until juices thicken and cling to the fruit. Add 1 tbsp lemon juice to balance sweetness.
Common mistake here is tossing raw apples straight into the oven. That steams them. Pre-cooking ensures jammy interior and a clear path to a crisp edge.
2. Thickening Right: Cornstarch, Not Too Much
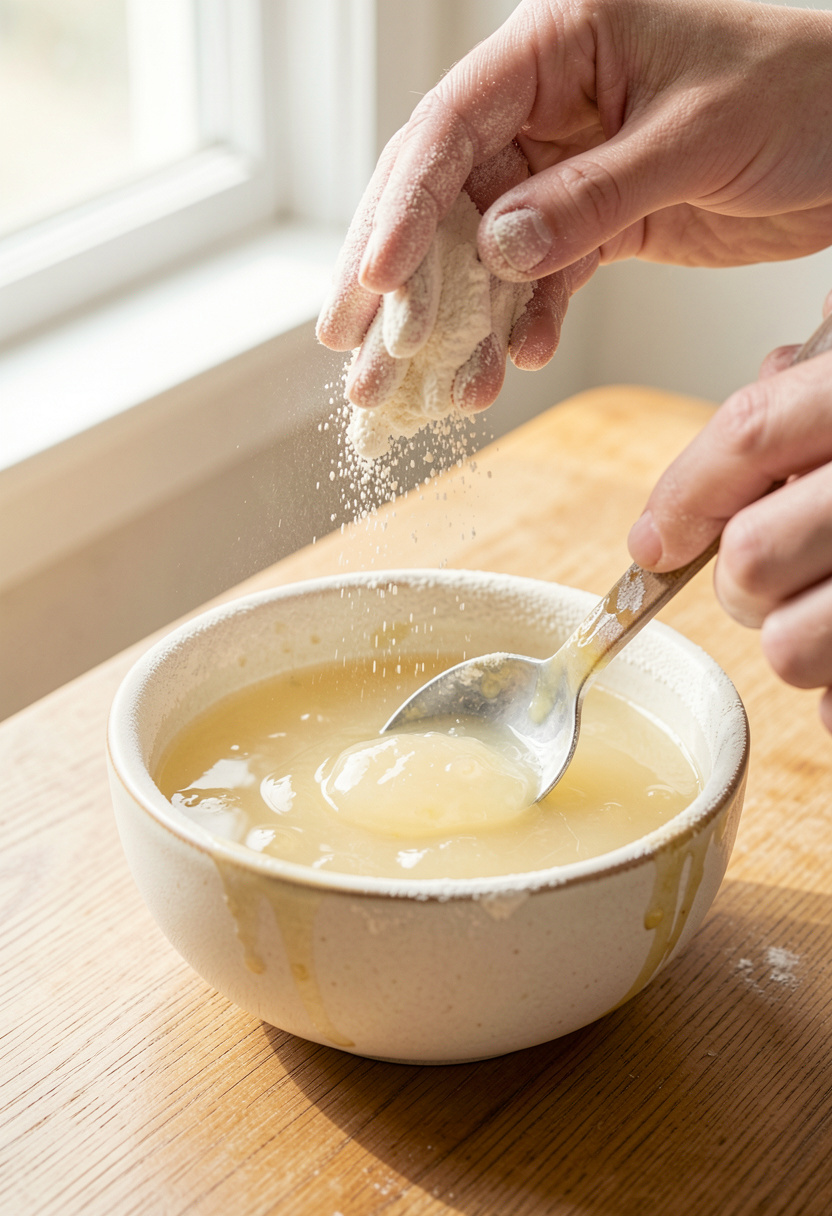
The trick to a glossy filling that sets without gluey chew is a light cornstarch slurry. This controls viscosity while keeping the fruit distinct.
I like Argo cornstarch 16 oz around $2 to $4 and use a 1:1 slurry ratio, mixing 1 tbsp cornstarch with 1 tbsp cold water per 3 cups apples. Add it to the hot pan, simmer 1 to 2 min until the juices thicken and turn glossy.
This is an application of gelatinization, where starch granules swell and trap liquid. Too much cornstarch yields a jelly. Too little leaves runny filling. Use the spoon test: sauce should coat the back of a spoon.
3. Biscuit Topping: Cold Butter, Rough Dough, Golden Edge
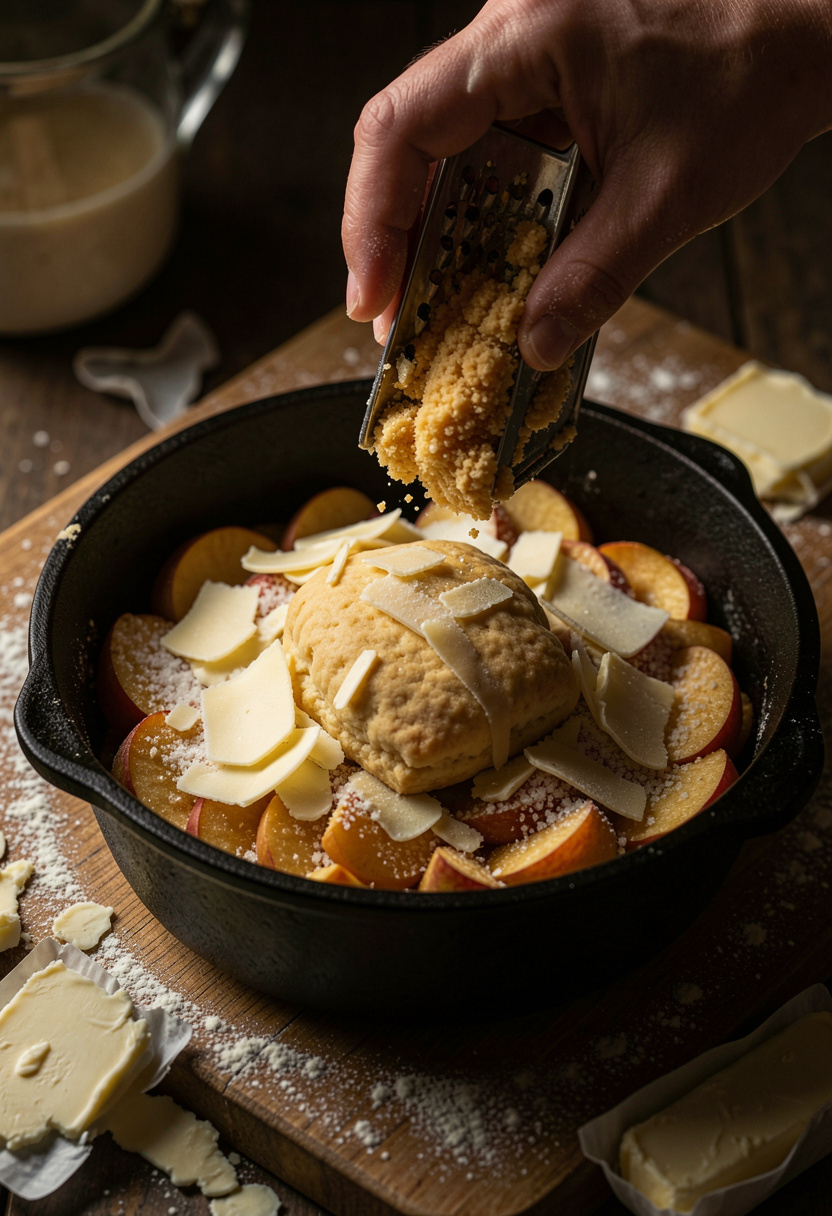
The crispy edge comes from a rough, cold-butter biscuit that meets hot fruit and caramelizes at the rim.
Use King Arthur all-purpose flour 5 lb around $5 to $9 and Land O Lakes salted butter sticks approx $3 to $6 kept cold. Rub or grate cold butter into the flour, mix just until shaggy, and drop large spoonfuls over the filling.
This relies on steam pockets created by butter melting, which create lift and crispness. Bake at 400°F for 35 to 40 min until the topping is deep golden and the filling bubbles at the edges. Avoid overmixing. Overworked dough makes dense biscuits, not crisp crowns.
4. High Heat Finish: Browning the Edge Without Burning
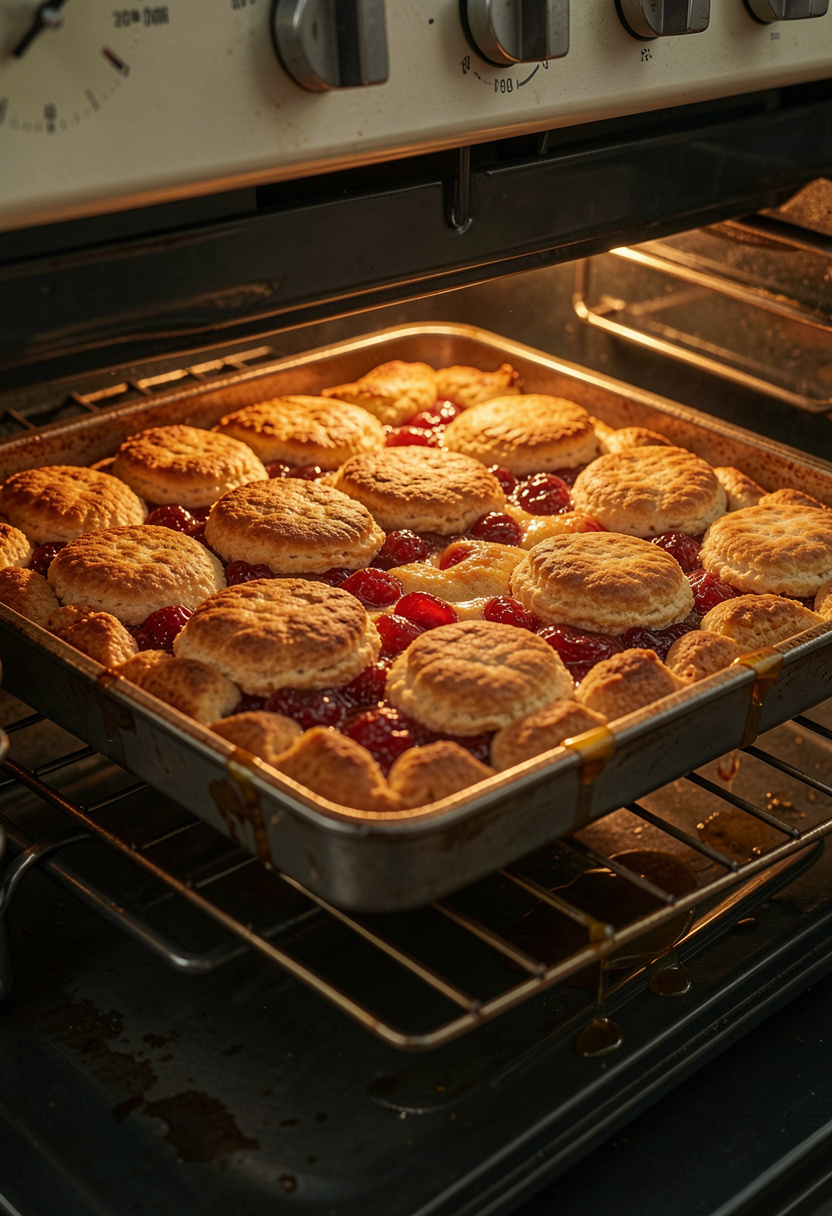
A final blast of high heat crisps the exposed biscuit edge while setting the interior.
An oven thermometer like the ThermoPro oven thermometer around $10 to $18 ensures your oven actually reads 400°F. Bake on the middle rack for 30 min, then move to top rack for 5 to 10 min if the edges need more color.
The principle is radiant heat producing Maillard browning on the exposed dough. Common error is lowering the temperature mid-bake because the top looks dark. Resist that. If the top threatens to burn, tent loosely with foil for the last 5 min.
5. Rest and Serve: Cool to Set, Add Salt and Cream
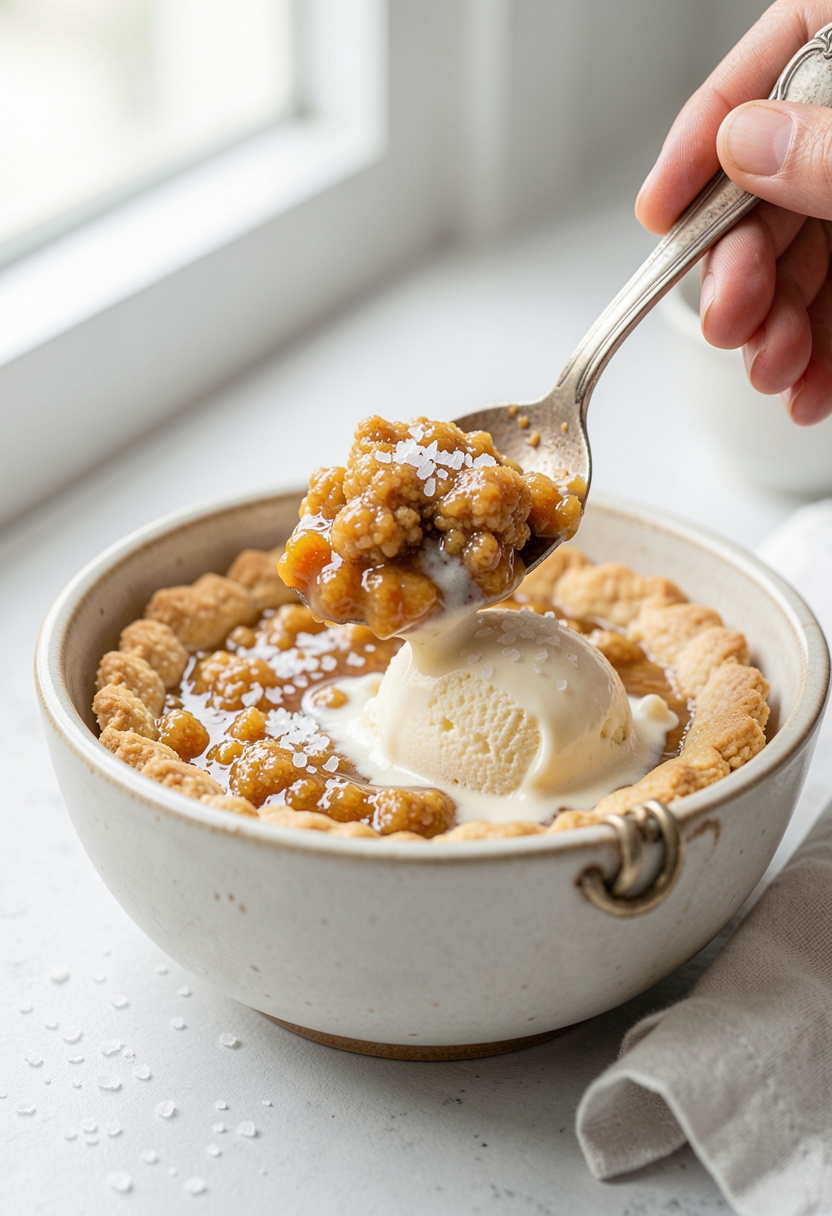
Let the cobbler rest 20 to 25 min before serving so the filling firms and the biscuits set. This small wait turns a sloppy scoop into neat slices.
Finish with a pinch of Maldon sea salt flakes around $6 to $12 and a scoop of Vanilla ice cream approx $4 to $8. The salt brightens the sugar and contrasts the richness.
Ugly truth: rush it and you get runny portions. Another ugly truth: pre-shredded pastry rarely gives the same flaky lift as cold butter grated by hand. Let it rest.
Common Cooking Mistakes to Avoid
Mistake: Skipping the stovetop pre-cook
Why it doesn't work: Raw apples release too much water and the topping stays soggy.
Do this instead: Sauté apples first in a Lodge cast iron skillet 10 inch approx $20 to $35 for evaporation and flavor.
Mistake: Over-thickening with cornstarch
Why it doesn't work: Filling becomes gluey when cooled.
Do this instead: Use a 1:1 slurry with Argo cornstarch 16 oz around $2 to $4 and simmer only until glossy.
Mistake: Baking on a cold sheet pan
Why it doesn't work: Cold metal steals heat and delays browning.
Do this instead: Place your dish on a preheated rimmed baking sheet like a Nordic Ware half sheet pan approx $12 to $20.
What You'll Need to Make This
Pantry Staples
Diamond Crystal kosher salt 3 lb box around $5 to $8
C&H dark brown sugar 2 lb around $3 to $6
Specialty Ingredients
Nielsen-Massey vanilla extract 2 oz around $6 to $12
Maldon sea salt flakes 4.4 oz around $6 to $12
Tools That Earn Their Counter Space
Lodge cast iron skillet 10 inch approx $20 to $35
Instant-read thermometer around $15 to $30
Microplane grater around $10 to $18
Cookbooks Worth the Shelf
Salt Fat Acid Heat by Samin Nosrat (price range $18 to $28)
The Food Lab by J. Kenji López-Alt (price range $20 to $35)
Budget Swaps
Pyrex 9×13 baking dish around $10 to $18, cheaper than fancy ceramic for even heat
Shopping Guide for This Recipe
Pick apples by texture: Choose firm apples like Granny Smith or Honeycrisp for structure, available at local farmers markets or stores.
Substitution hack: Out of brown sugar, stir 1 tbsp molasses into granulated sugar, try Karo molasses approx $3 to $6.
2025 trend tip: Many bakers are using browned butter in toppings this year for nutty notes, try Land O Lakes butter sticks approx $3 to $6.
Splurge vs save: Splurge on good vanilla like Nielsen-Massey vanilla extract if you serve with ice cream, save on generic flour.
Conclusion
Start with the stovetop glaze. It fixes most cobbler problems and gives you jammy fruit without overbaking.
Finish with a pinch of flaky salt and a scoop of quality vanilla ice cream to highlight the warm-sweet contrast. I bought my first cast iron at a flea market and still use it every fall.
Will you try pre-cooking the apples or skip straight to raw-in-dish?