
My first tres leches ended with a soggy doughnut of despair in the middle. I made the same mistake twice before I learned to treat the cake like a sponge with a temper. If you want to learn how to make tres leches cake that soaks evenly without a mushy center, I’ll show the exact moves I use now.
This recipe is approachable for a weekend baker. Expect 30 min hands-on, 25–30 min bake, then 4 hr chilling. It’s beginner-friendly but there is one fiddly moment: the soak.
1. The Light Sponge: Whip Eggs for Structure
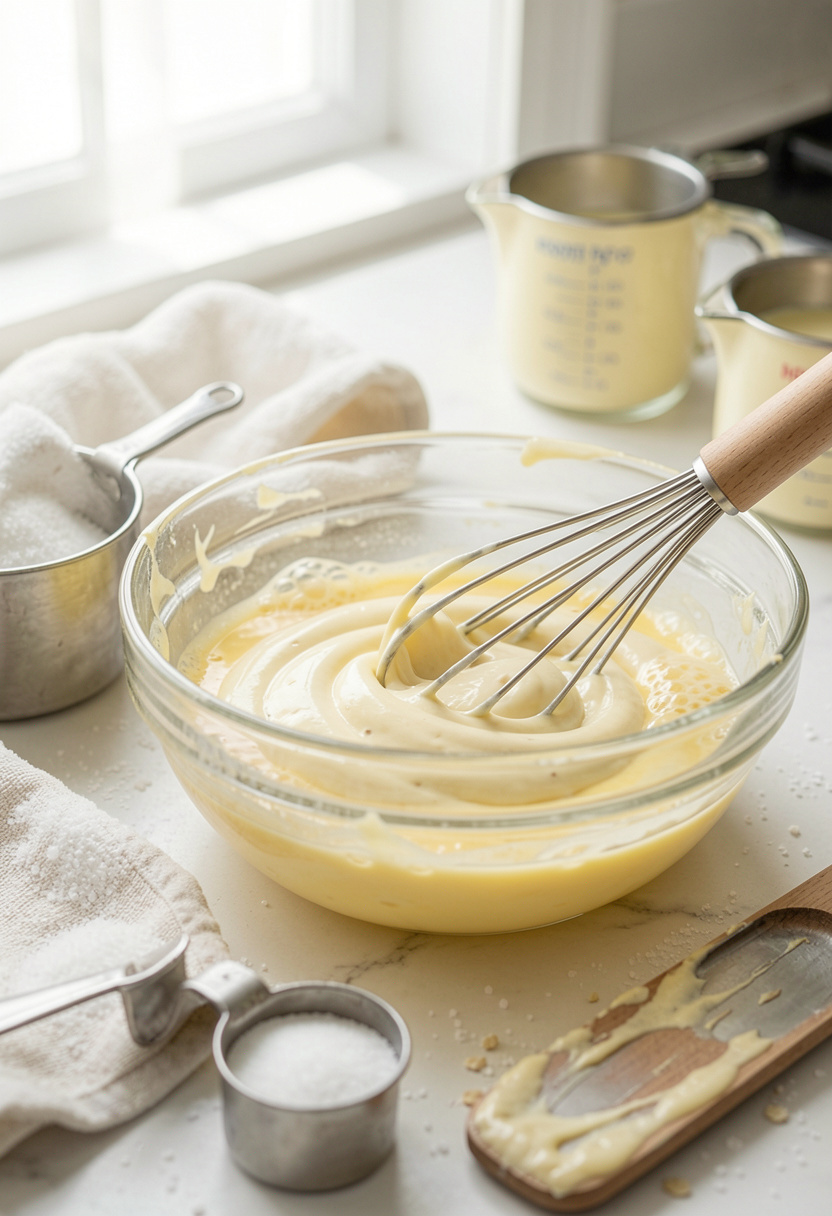
You want a sponge that can hold the milk without collapsing. That means whisk eggs and sugar until tripled in volume and pale ribbons form. This creates a foam network that traps air and gives body.
Use a KitchenAid Artisan stand mixer 5 qt or a sturdy OXO stainless whisk if you’re doing it by hand. Room-temperature eggs whip better; let them sit 20 min.
The science at play is simple: trapped air and coagulated egg proteins set a scaffold. Bake until the cake is golden and springs back. Mistake people make here is under-whipping. If the batter still looks glossy and wet it will collapse and later weep when soaked.
Aim for 8 to 10 min in a stand mixer on medium-high or 12 to 15 min by hand. Then fold in gently with a silicone spatula to keep the air.
2. Bake to the Right Doneness: Golden, Not Pale
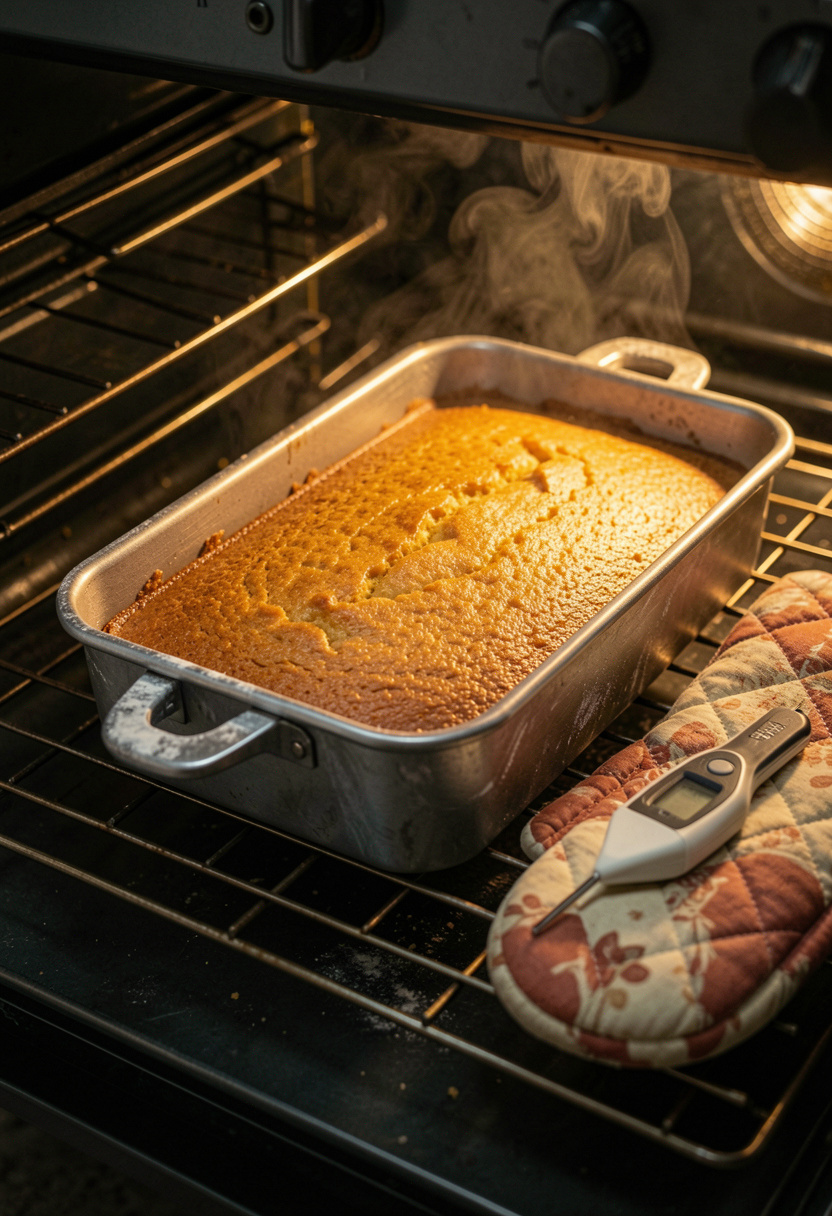
Bake at 350°F for about 20 to 30 min in a Wilton 9×13 cake pan. The cue I trust is color and springback. The center should jiggle slightly but not sink when you tap it.
An instant-read thermometer is handy; cake crumb is reliably set around 200°F. Overbaking dries it out, underbaking leaves a gummy core that soaks into paste.
Don’t open the oven repeatedly. That ruins rise. One common viral hack I tried was using higher temp to speed it up. It browned fine but the interior remained dense. Slow even heat wins here.
3. The Poke-And-Soak: Controlled Channels for Even Absorption
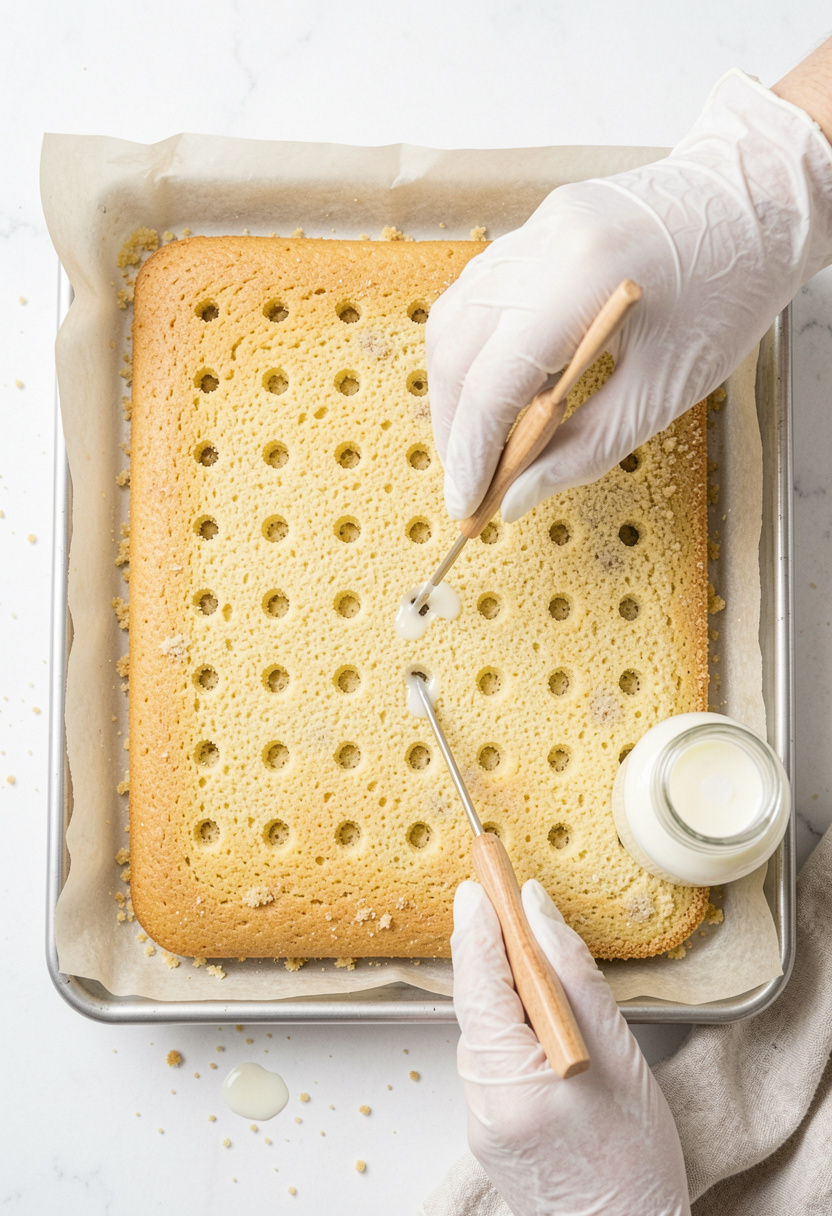
Poking creates channels, but the trick is restraint. Use a long metal skewer or the thin end of a wooden spoon in a 1-inch grid. That gives milk somewhere to go without turning the center into porridge.
Mix 1 can sweetened condensed milk, 1 can evaporated milk, and 1 cup whole milk or heavy cream. I keep it in a plastic squeeze bottle so I can apply the soak evenly. For a richer finish, swap 1/2 cup whole milk for heavy cream.
Pour slowly, let it sit 5 minutes, then pour another pass. The principle is capillary action meeting gravity. Too much liquid at once pools on top and soaks only the surface. Too little leaves dry edges.
A mistake I used to make was flooding the pan in one go. The result was a glazed top and a wet center. Patience and slow pulses of liquid are your friends.
4. Chill and Stabilize: Cold Sets the Custard, Not the Guilt
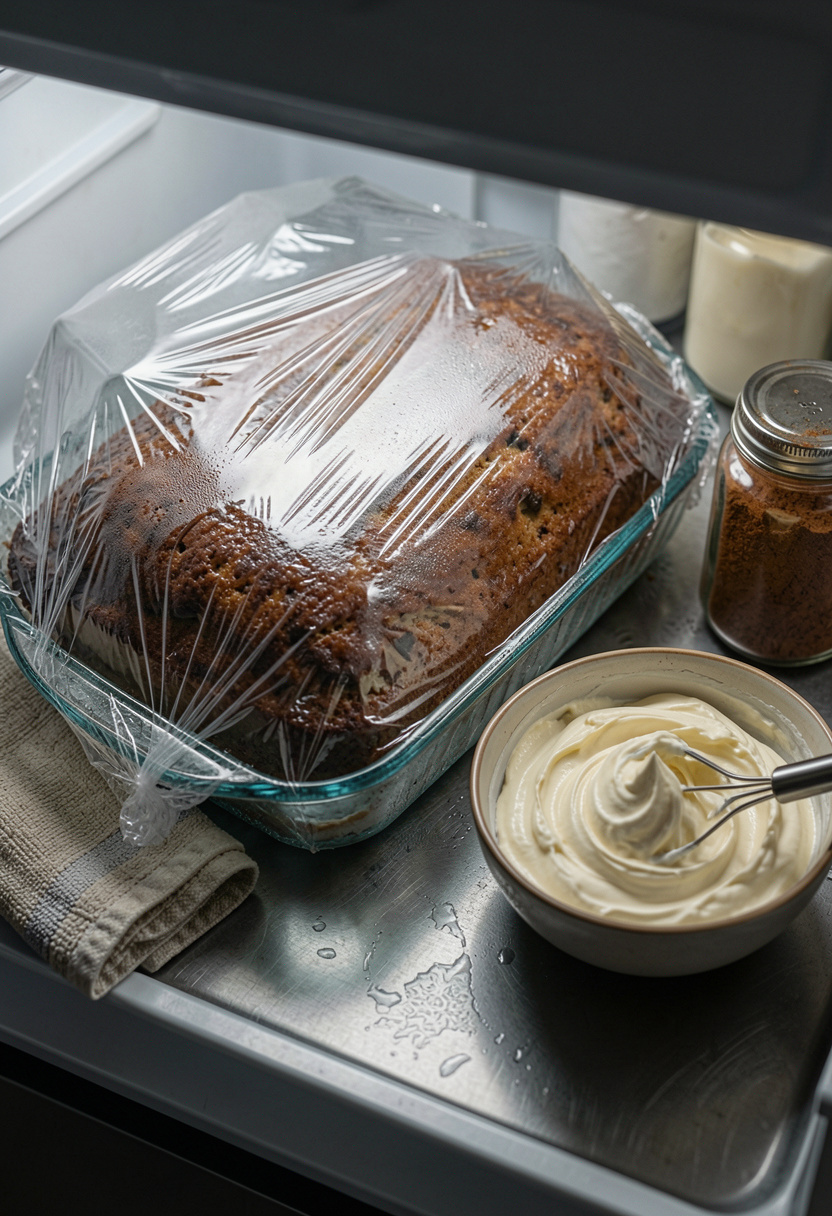
Chill the soaked cake at least 4 hr, preferably overnight. Cooling lets the milk matrix redistribute and the proteins in the eggs and dairy firm up. This is the single biggest guard against a soggy middle.
Top with stabilized whipped cream so the topping does not weep. I whisk 1 cup heavy cream with 2 tbsp powdered sugar and 2 oz cream cheese, or use a pinch of gelatin dissolved in warm water. A hand mixer makes quick work.
Cut with a serrated knife in a sawing motion. Serve cold. One ugly truth: freezing a too-wet cake rarely fixes texture; it makes ice crystals that open the crumb. Chill, then slice.
Common Cooking Mistakes to Avoid
Mistake: Flooding the cake with the milk mixture all at once
Why it doesn't work: Surface soaks and the center stays gummy.
Do this instead: Apply liquids in slow passes using a plastic squeeze bottle about $6 to $12.
Mistake: Skipping full bake to save time
Why it doesn't work: Underbaked crumb collapses when soaked.
Do this instead: Bake until golden and tested with an instant-read thermometer approx $10 to $25.
Mistake: Topping with plain whipped cream immediately after soaking
Why it doesn't work: Topping slides off as the milk redistributes.
Do this instead: Chill 4 hr, then pipe stabilized whipped cream with an offset spatula approx $8 to $15.
What You'll Need to Make This
Pantry Staples
Sweetened condensed milk 14 oz can around $2 to $4
Evaporated milk 12 fl oz can around $2 to $4
Granulated sugar 2 lb bag around $3 to $6
Specialty Ingredients
Ground cinnamon Ceylon 2 oz approx $6 to $12
Heavy whipping cream 16 oz around $3 to $6
Tools That Earn Their Counter Space
KitchenAid Artisan stand mixer 5 qt approx $250 to $450
Wilton 9×13 cake pan around $10 to $20
ThermoPro instant-read thermometer approx $10 to $25
Cookbooks Worth the Shelf
Salt Fat Acid Heat by Samin Nosrat (price range $18 to $28)
The Food Lab by J. Kenji Lopez-Alt (price range $20 to $35)
Budget Swaps
Generic 9×13 aluminum pan around $6 to $12 (Aldi often has cheap pans for half the price)
Shopping Guide for This Recipe
Choose whole dairy for richness: Use full-fat milk or heavy cream for a custardy mouthfeel, like Organic Valley heavy cream $3 to $6.
Substitution hack: Out of evaporated milk? Simmer 2 cups whole milk to reduce by one third and cool; see evaporated milk options $2 to $4.
Trend pick 2025: Many home bakers are stabilizing toppings with a little cream cheese for longer display life, per tests at Serious Eats and Cook's Illustrated. Try a cream cheese block 8 oz $2 to $4.
Splurge vs save: Splurge on a reliable mixer if you bake often; save on parchment and pans. KitchenAid stand mixer $250 to $450 vs Wilton pan $10 to $20.
Conclusion
Start with the sponge phase. Whip the eggs right and you halve the chances of a soggy middle before you touch the milk. Chill fully after soaking; cold sets the custard and gives you clean slices.
Will you try the slow soak or the richer cream-forward version first?